DIY Throne
I was beyond excited when I was asked to decorate for this year’s Be-You-tiful Girls Retreat. This year’s theme...Winter Wonderland! As soon as I was asked, ideas began twirling around in my mind. No seriously as I laid in bed “thoughts of sugar plums danced in my head”. Okay maybe not sugar plums but snowflakes and icicles and snow and blue lighting and...okay you get the picture. Anywho Ias I said I was BEYOND excited! Where to start? First things first with me, the budget. Now I would LOVE an unlimited budget but...okay wait a minute...let’s be honest, there’s no such thing as an “unlimited budget” for me, my inner cheapskate just couldn’t cope. I NEED a budget! I mean how else could I come in UNDER budget if a budget isn’t set, right? Ooops let me tuck in my competitiveness (it slips out on occasion).
During my whirlwind of ideas a thought popped into my head (scary right)...a throne! I mean this is geared to teenage girls and who isn’t somehow just drawn to a great photo opportunity right? A throne with a cute backdrop...perfect. Now how do I make it happen with a limited budget...DIY of course!
So here it is my take on an “ice throne” on a budget...
First I started with a sketch. Don’t laugh I never claimed to be an artist.

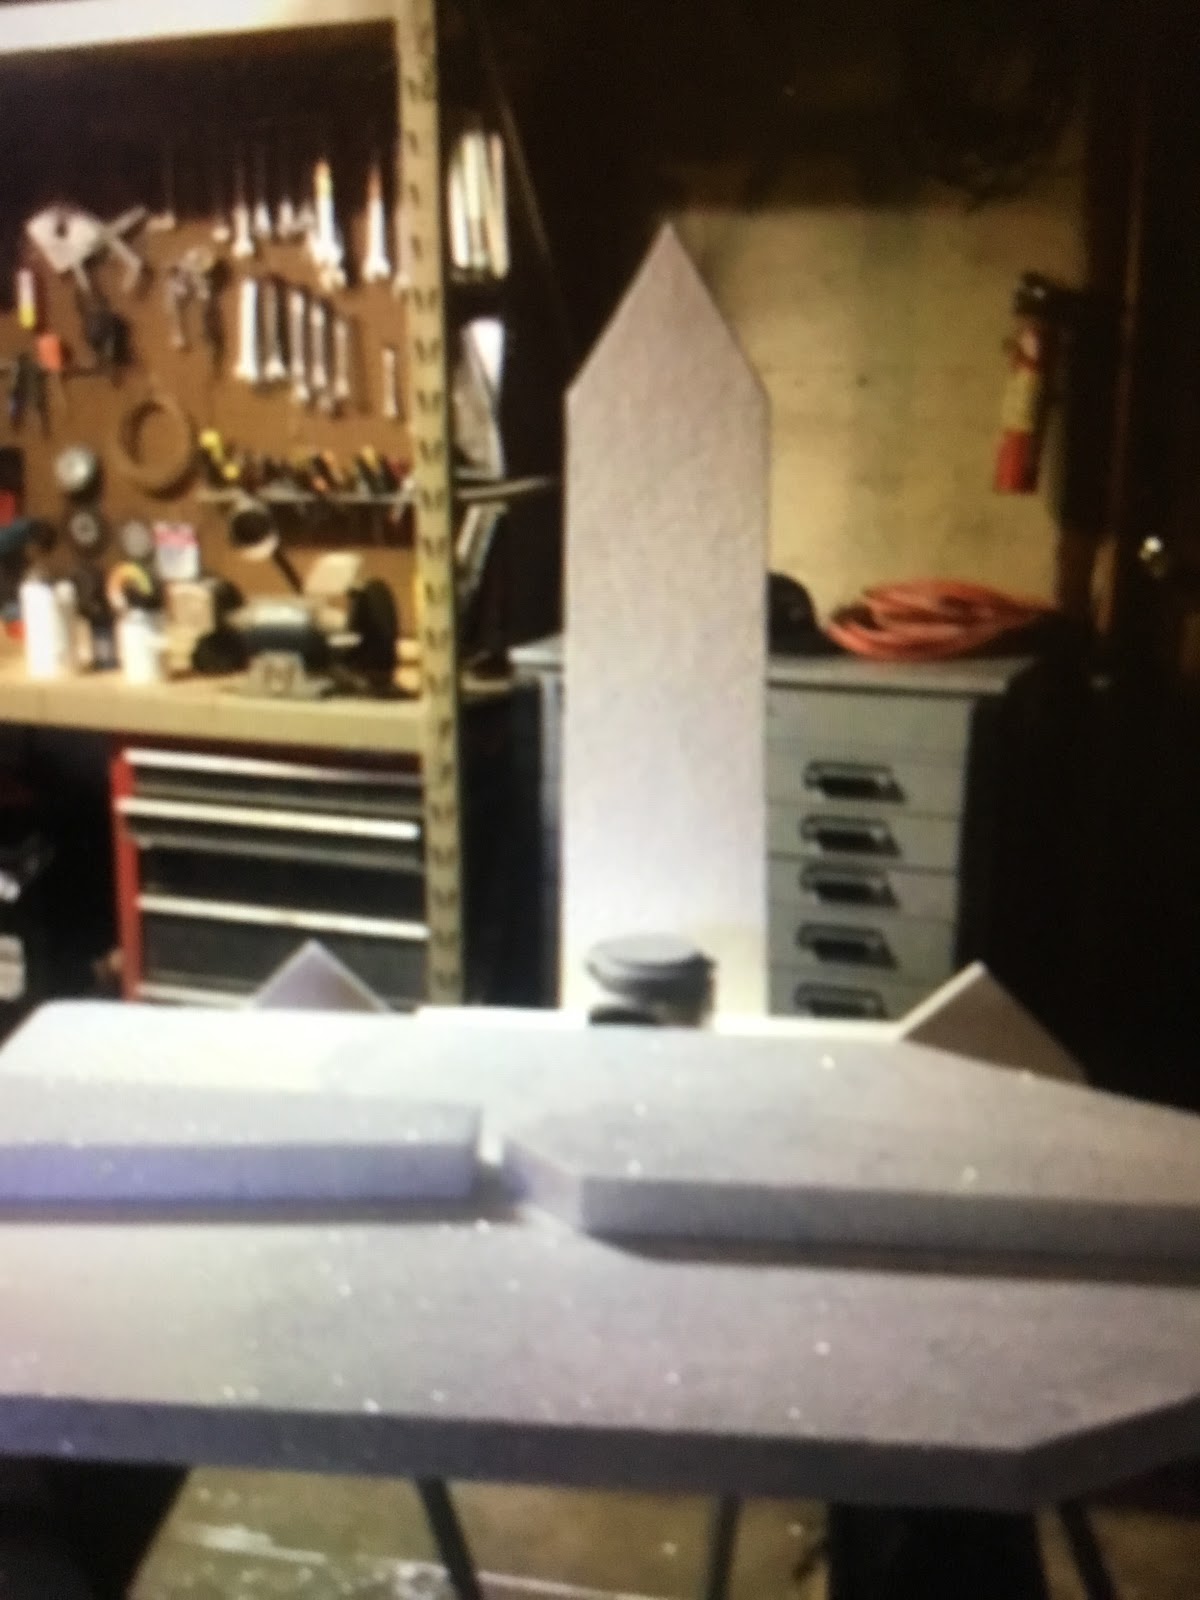
Next step was cutting out the pieces. I used some chip board I had left over from our house remodel (glad that’s over with) and a piece of foam board that was left over from a project at church. The one I made stands about 5’6” because...well I had a tall skinny piece of chip board is what I had. I also had enough chip board to cut out the seat and arms. Here’s a picture of my pieces parts.


And here is a better picture of what it will kind of look like

Next I painted everything white. The chipboard took three coats and the foam board I painted with one coat it didn’t completely cover but that was fine I’ll show you why later. I then mixed up a few different colors of glitter. For this I mixed equal amounts of silver and white and about a quarter of much of blue to get the snowy look I wanted. (Note: you could use different color combinations to achieve a different look...examples...a couple different greens and brown for a camouflage look, red, silver and white for a Santa theme, pink white and silver for a little girl, the options are endless)

Now about the one coat as I previously mentioned. I only planned to glitter the foam board which is why I wasn’t concerned with complete coverage. I mixed the glitter as I waited for the first coat to dry. Then I applied a second coat of white paint and before it dried I sprinkled, and by sprinkled I mean poured, the glitter over all the foam pieces. I was glad I was working in the garage because it was a MESS! On the up side my husband’s manly space is now glitterific lol. Here’s what it looked like while drying
I didn’t want the glitter to flake off everywhere and glitterfy (yes that’s a word in my vocabulary) everyone that sat on the throne. To seal the glitter I used Mod Podge. I had some left over but you can get this at Walmart or any craft supply place.

Mind you I was working in an unheated garage so it took FOREVER for it to dry! Plus I was in a hurry to put it together soooo I brought it inside to speed along the drying process. Once it was dry I was able to assemble it all together. The chipboard bench was put together using screws. The foam board was “glued” on with liquid nail which can be found at any home improvement store, again I had some left over from our remodel.
So here it is, my version of an ice throne...the only cost I had was some blue glitter. Everything else was left overs...scrap chipboard, foam board, left over paint, glitter, mod podge, screws and liquid nail. So this throne, total cost was.....$2.82
BOOMSHACKALACKA
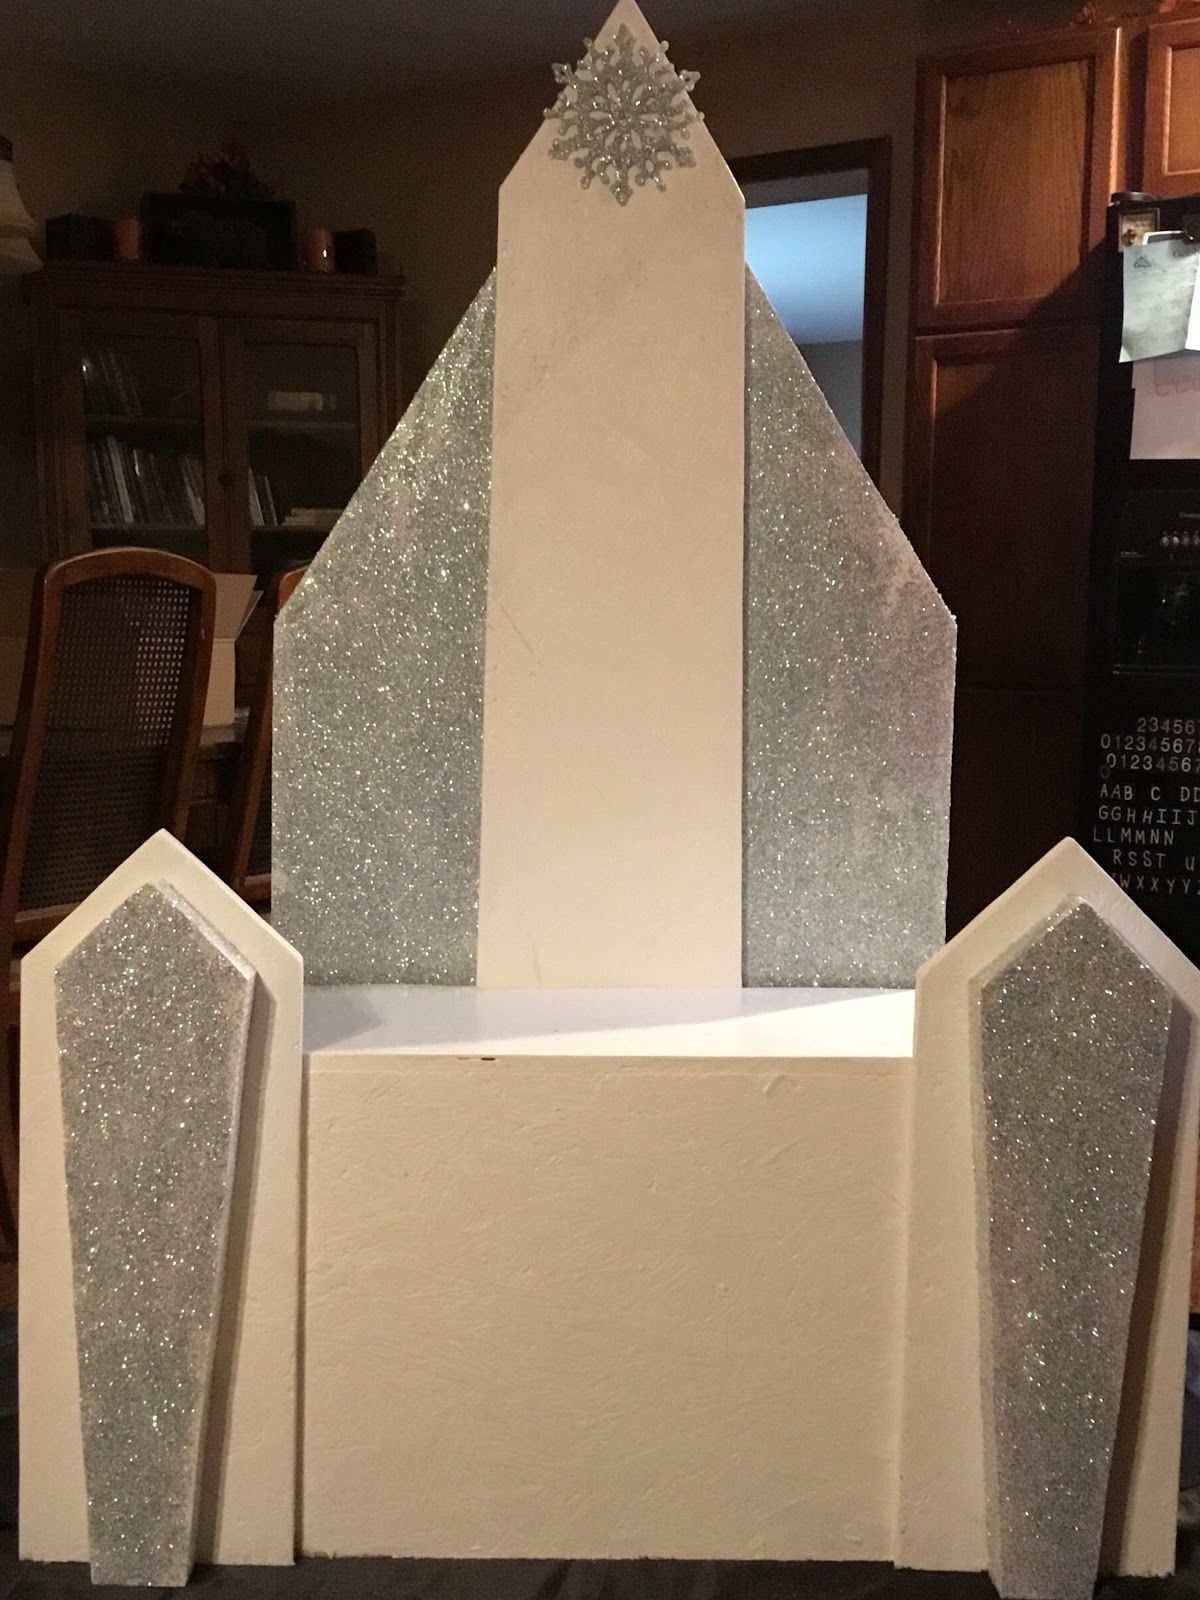
PS the snowflake at the top...leftover ;)


No comments:
Post a Comment